

Close2Me bed to any bed frame: complete 2026 attachment workflow
Instead of lifting your furry friend onto your mattress each night, set up a separate bedside sleeping space with the Close2Me Pet Bed after checking its attachment instructions against your bed. This 2026 guide explains how to assess a dog bed that attaches to your bed frame, prepare the space, and check the setup without assuming it fits every frame.
- Close2Me Pet Bed attaches to your bed; confirm the approved attachment location before installing it.
- A dog bed that attaches to your bed frame needs a compatibility check, not an improvised connection.
- Furmatesusa bedside pet beds suit pet parents who want a separate sleeping space close to their own.
- Check height, stability, and your pet’s access before introducing the finished co-sleeper setup.
Why this matters
A bedside pet bed gives your furry friend a place of their own without moving them across the room. The Close2Me Pet Bed description identifies it as compact, adjustable, and designed to attach to your bed for a dog or cat to rest.
That description does not establish compatibility with every bed frame. “Attaches to your bed” is not the same as “attaches to any bed frame.” The connection method, permitted mounting surface, and adjustment limits must come from the instructions for your exact product.
Furmatesusa bedside pet beds are best for pet parents who want a separate sleeping space close to their own. The benefit is closeness; the trade-off is that the bedside space must accommodate both the product and your normal route in and out of bed.
Before you start
- Gather the product and its instructions. Identify the exact model, check the parts against its parts list, and use only the tools and attachment components the instructions specify. Keep your pet elsewhere during assembly.
- Record 3 measurements in inches. Measure floor-to-mattress height, usable space beside the bed, and the attachment surface dimensions required by the instructions. These are measurements of your room, not product specifications.
- Check the hidden obstacle first. Upholstery, bedding, drawers, or moving frame sections can conceal the intended connection area. Do not treat a decorative panel or fabric-covered edge as an approved mounting point.
For a 2026 setup, use the instructions supplied with your exact model rather than a photo of another bedside bed. Similar-looking products do not establish the same installation method.
Before assembling anything, also confirm the product’s stated size and load limits against your pet. Do not estimate a safe limit from the bed’s appearance or use your pet to test an uncertain connection.
Bedside space and compatibility
Confirm the attachment location
- Identify the model. Match the product name on your packaging or documentation to the instructions you are using. Close2Me Pet Bed, Close To Me Nest, and Close To Me Oval Nest are distinct product names.
- Find the approved connection method. Read the installation section before selecting a position. Do not assume that the product clamps to a rail, slides beneath a mattress, or uses straps unless its instructions specify that method.
- Inspect your bed. Locate the surface or component named in the instructions. Check that it is accessible and that the bed itself has no loose or damaged parts in that area.
- Make a fit decision. Continue only when your bed meets the stated installation requirements. If the instructions do not clearly cover your configuration, resolve that question before assembly.
Expected result: You can identify the approved attachment location on your own bed and explain how the product connects there. If you cannot, the setup stops here—not halfway through installation.
Prepare the bedside area
- Clear the floor. Move loose cables, shoes, and other objects away from the installation area. Keep the path you use to get out of bed open.
- Check the full footprint. Include the pet bed’s support structure and any separate access aid, not just the sleeping surface. Open nearby drawers and doors to check for interference.
- Move bedding aside. Keep blankets and sheets out of the connection area while you inspect and assemble it. Bedding should not hide the finished attachment.
- Choose the usable side. Select a side that meets the installation requirements and leaves a practical route for you and your pet. Convenience alone does not make a location compatible.
Expected result: The proposed position allows installation, inspection, and everyday access without blocking the room’s normal use.
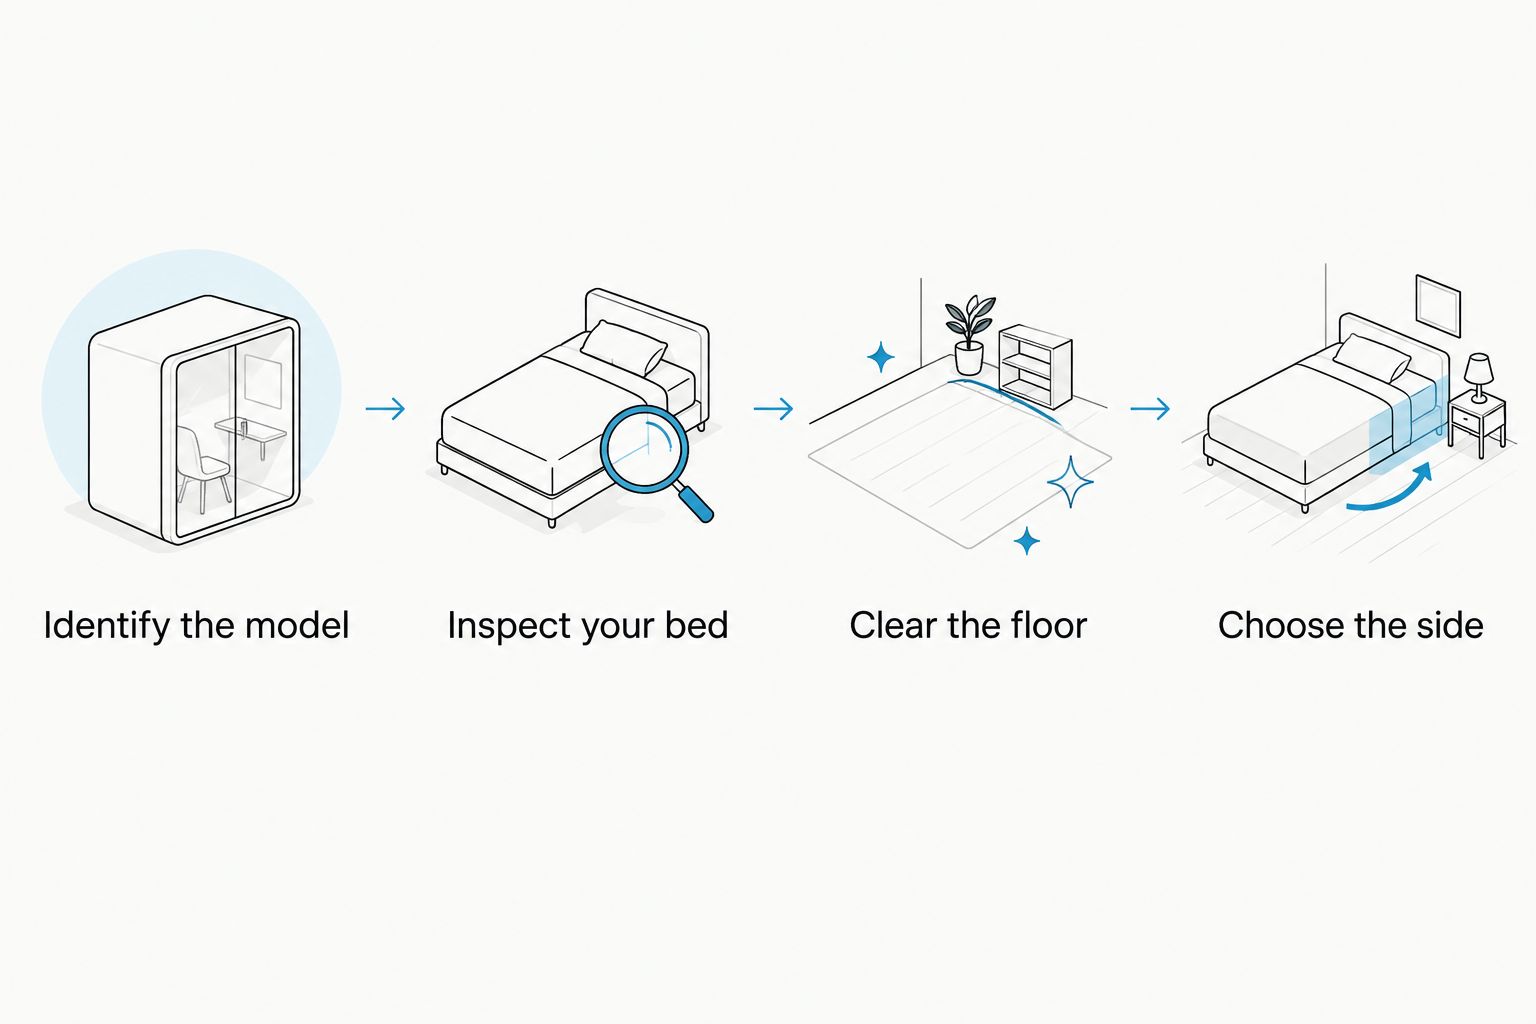
The preparation sequence keeps the compatibility decision ahead of assembly. You should not need to improvise a connection just because you have already cleared the room or unpacked the product.
Assembly and attachment
Assemble the pet bed
- Lay out the components. Compare them with the product’s parts list and separate assembly parts from packaging. Stop if a required component is missing or damaged.
- Follow the documented order. Assemble supports, the sleeping area, and any other components in the sequence specified for the model. Do not copy the sequence from a different bedside bed.
- Use the specified hardware. Do not substitute household screws, straps, clamps, or adhesive for the supplied or explicitly approved components.
- Inspect the assembly. Check that each connection is complete according to the instructions. Keep all coverings away from connections until you finish this inspection.
Expected result: The pet bed is assembled as directed, with no unexplained spare attachment parts and no missing connections. Your pet remains off the product during this stage.
Complete the approved attachment
- Position the assembled bed. Bring it to the approved location without your pet inside. Keep the connection area visible.
- Connect it exactly as directed. Follow the product’s stated method and any requirements for the supporting bed. Do not attach to a nearby surface merely because it appears easier to reach.
- Set the permitted adjustment. Use only the product’s documented adjustment range and locking method. Do not add blocks, wedges, or furniture to create extra height.
- Complete the stated checks. Perform any inspection or stability procedure included in the instructions. Do not invent a load test by pushing, hanging, or sitting on the sleeping area.
Expected result: The approved connection is complete, the adjustment is secured as instructed, and the pet bed sits in its intended position without interference from bedding or furniture.
For your 2026 installation, the product instructions determine the attachment method. This workflow helps you organize the job; it does not replace model-specific assembly directions.
Sleeping height and pet access
Check the finished position
- Compare the sleeping surfaces. Inspect the relationship between your mattress and the pet bed’s sleeping area. Follow any height or separation requirements stated by the manufacturer rather than aiming for a visually flush edge.
- Inspect nearby spaces. Look for openings where your pet could become caught and places where bedding could fall into the pet’s sleeping area. Do not fill an unexplained gap with pillows or folded blankets.
- Plan entry and exit. Decide how your pet will reach and leave the bed without relying on an uncontrolled leap. Use an access aid only when it suits the product, the available space, and your pet’s abilities.
- Invite, rather than place and leave. Let your furry friend investigate under supervision. Stop if the setup moves, your pet struggles to enter, or the sleeping area does not accommodate their resting position.
Expected result: Your pet has a usable sleeping space and a workable access route, while you can still inspect the attachment and get out of bed normally.
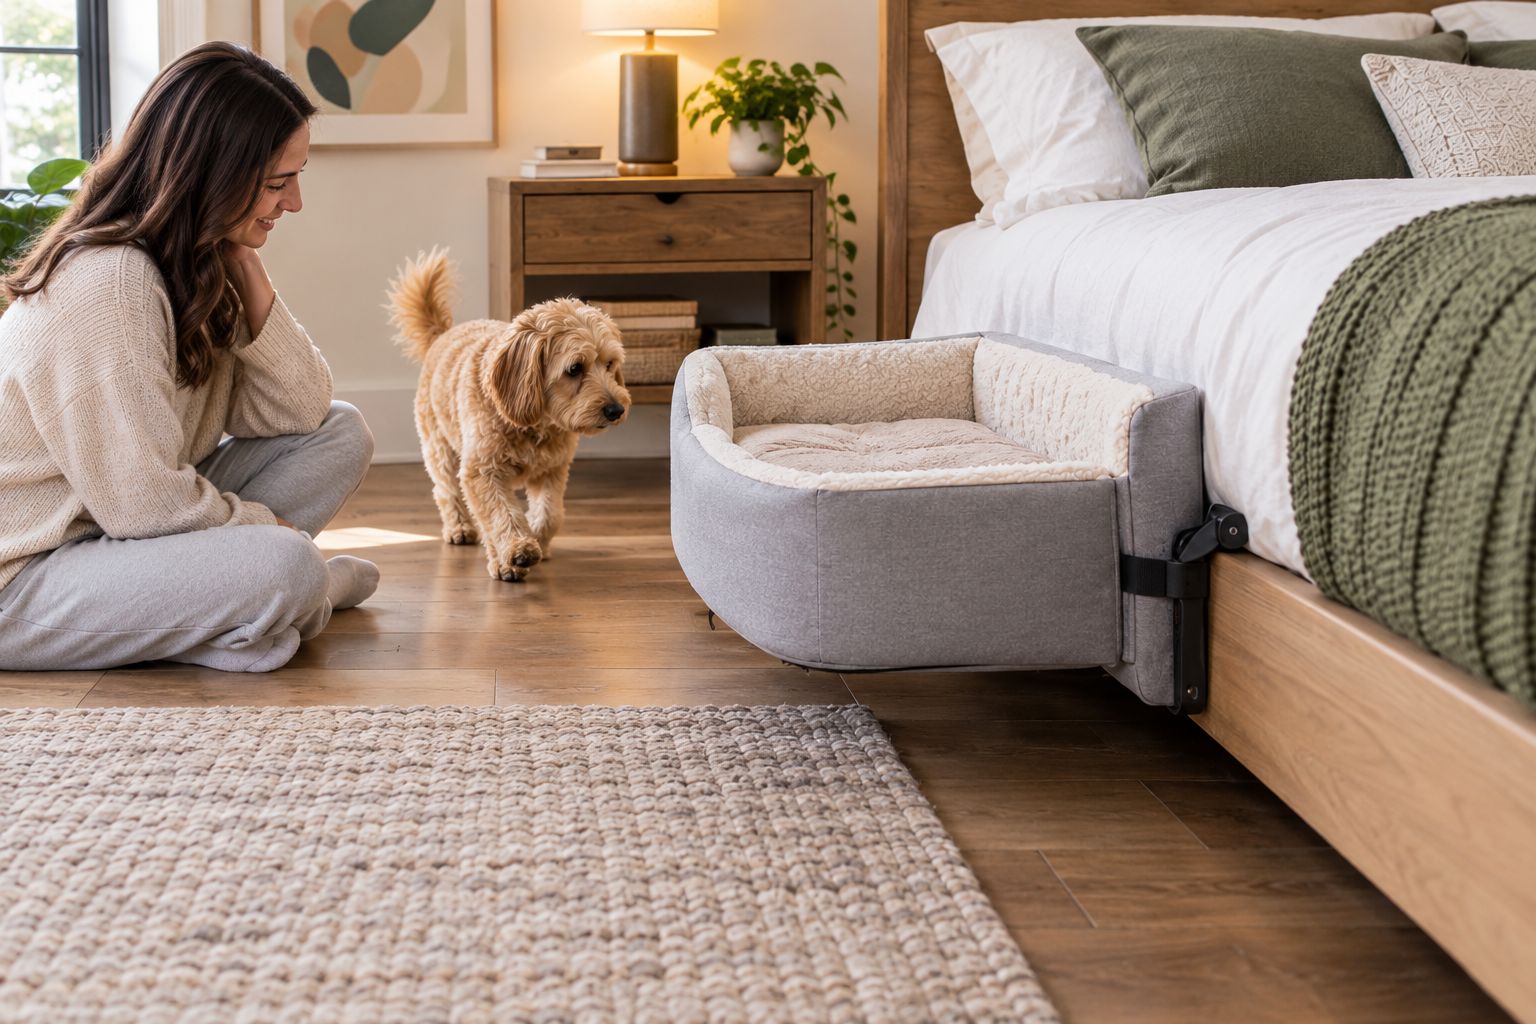
Do not use your dog or cat as the installation test. Finish the product’s required checks first, then supervise the introduction. If your pet has pain, restricted movement, or recovery instructions, ask your veterinarian which access method is appropriate.
Which bedside bed should you assess?
Choose by the intended sleeping arrangement and verified fit, not by the assumption that all bedside beds share an attachment system. The supplied descriptions establish the following differences, but not frame compatibility, dimensions, or load limits.
| Product | Best for | Stated benefit | Limitation to check |
|---|---|---|---|
| Close2Me Pet Bed | Pet parents seeking a bed-attaching sleeping space | Described as compact, adjustable, and attaching to your bed | Confirm the connection method and compatibility with your bed |
| Close To Me Nest | Bedside Pet Bed | Pet parents seeking a separate bedside sleeping space | Designed to keep your pet close and comfortable while you sleep | Its description does not establish the same attachment method as Close2Me |
| Close To Me Oval Nest | Bedside Pet Bed | Pet parents considering an oval bedside sleeping space | Gives your pet their own cozy sleeping space near you | Confirm dimensions, access, and installation requirements |
Choose Close2Me Pet Bed when attachment is your priority and your bed meets its installation requirements. Consider the Nest options for their stated bedside purpose, but verify their setup separately.


Repeat the workflow after a bedroom change
Moving the pet bed to the other side of your mattress is a fresh installation check, not simply a furniture shuffle. The new position can change the attachment access, floor space, and entry route.
- Remove your pet first. Follow the instructions for releasing or repositioning the product; do not drag a connected pet bed across the room.
- Repeat the measurements. Check the new location’s height, usable space, and required attachment dimensions in inches.
- Reinstall and inspect. Repeat the approved connection and adjustment steps, then check the pet’s access route before use.
Run the same check after changing your mattress, adding a topper, or replacing your bed frame in 2026. A previous successful fit does not establish a fit with a changed bed.
Troubleshooting
- The intended connection area is inaccessible. Stop rather than fastening to upholstery or a decorative edge. Compare your bed with the installation requirements and request model-specific guidance if the fit remains unclear.
- The assembled bed shifts or a connection feels loose. Remove your pet and inspect the assembly against the instructions. Do not solve movement with improvised straps or extra tightening beyond the stated method.
- The sleeping height does not work. Recheck the permitted adjustment and your floor-to-mattress measurement. If the required position falls outside the documented range, do not extend it with makeshift supports.
- Drawers, bedding, or your walking route interfere. Reassess the location before use. An otherwise compatible attachment is not a practical setup if it blocks access or cannot stay clear.
- Your pet hesitates or cannot enter comfortably. Keep introductions supervised and avoid forcing your pet onto the bed. Recheck the access route; seek veterinary guidance when discomfort or limited mobility affects entry.
Customize your workflow
Make the bedside setup part of your ordinary evening routine. Clear the approach, keep bedding away from the pet’s space, and inspect the connection whenever something has been moved or adjusted.
Furmatesusa bedside pet beds support the goal of keeping your furry friend nearby, but the finished arrangement still needs to suit your room and your pet. Prioritize usable space over a perfectly symmetrical bedroom layout.
Keep a simple 2026 setup record: the model name, your measurements in inches, and the instructions used. A photo of the finished connection can help you notice changes later, but it does not replace a physical inspection.
FAQ
Does Close2Me Pet Bed attach to any bed frame?
Do not assume Close2Me Pet Bed attaches to every bed frame. Its description states that it attaches to your bed; confirm the approved connection method and bed requirements in the model’s instructions.
What should I check before installing a dog bed that attaches to your bed frame?
Check the approved attachment location, required dimensions, adjustment limits, and your pet’s fit before assembly. Also confirm that nearby drawers, bedding, and walking routes will remain clear.
Can I attach a bedside dog bed to an upholstered frame?
Use an upholstered frame only when the product’s instructions explicitly permit the relevant connection. Fabric covering alone does not identify a suitable mounting surface.
Should the pet bed be level with my mattress?
Follow the product’s stated height and separation requirements rather than assuming the surfaces must be level. Mattress height alone does not establish a safe or compatible installation.
Can I use extra straps or household clamps if the attachment does not fit?
Do not improvise an attachment with household straps or clamps. Use only components and methods approved in the product instructions, and stop when your bed does not meet those requirements.
Are Close To Me Nest and Close2Me Pet Bed installed the same way?
Do not assume these Furmatesusa bedside pet beds share an installation method. Close2Me is described as attaching to your bed, while each Nest option needs its own setup requirements checked.
Do I need to reinstall the pet bed after changing my mattress in 2026?
Recheck the installation after changing your mattress in 2026. Confirm the sleeping height, attachment position, nearby spaces, and access route before your pet uses it again.
What if my dog will not use the new bedside bed?
Let your dog investigate the finished setup under supervision without forcing them onto it. Check comfort and access first, and ask your veterinarian about entry arrangements if movement is difficult.
One last thing
Check the bedroom as you actually use it: blankets pulled back, a drawer open, and your usual route out of bed available. A setup that fits an empty corner still has to work during an ordinary night. Keep your furry friend nearby without turning their sleeping space into an obstacle.